
What we will learn in this blog post is about retrieving data in SQL Table (outside of Dataverse – via Virtual Table mechanism) and creating the simplest business logic possible (in my opinion). For example, we want to build a point-based system where we can Add and Deduct the points for the customer. These points will be stored in the SQL Table. However, all the membership information will be stored in Dataverse. The goal of the design is to use Dataverse only and here is how I create the solution!
SQL Table
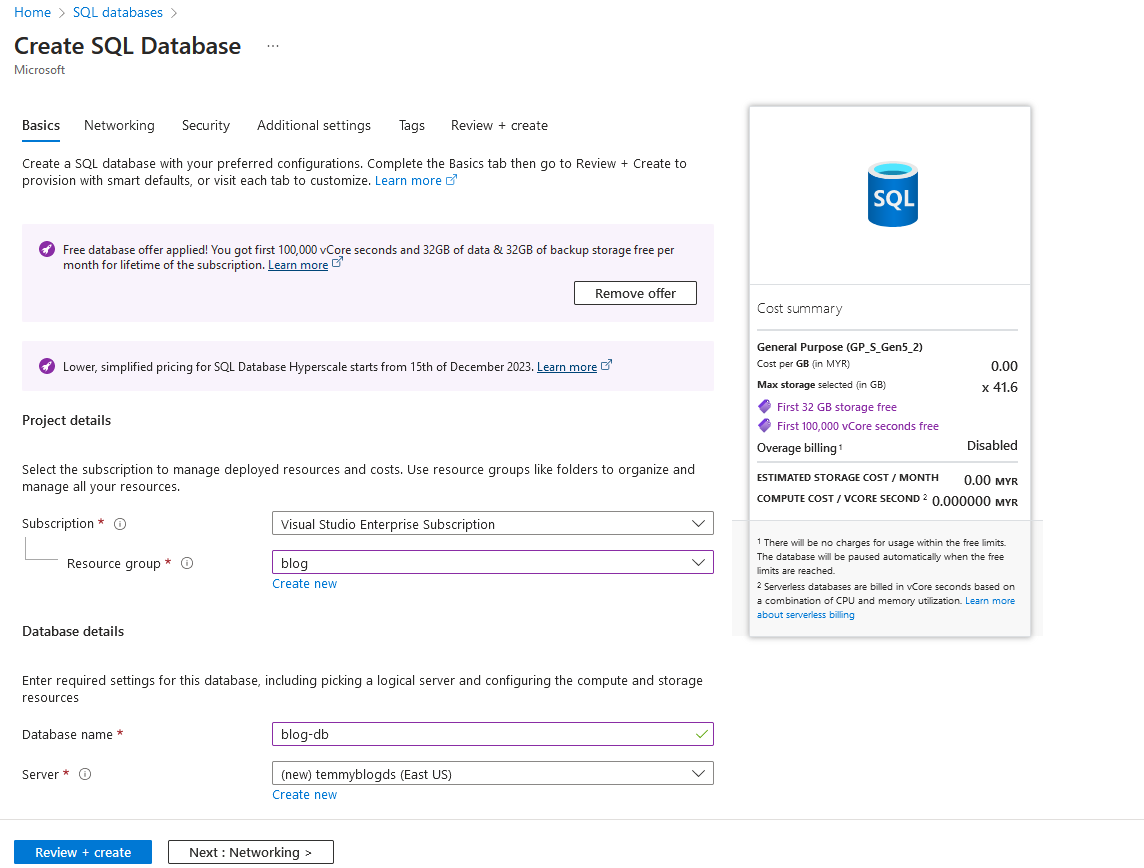
Go to your portal.azure.com > Create your SQL Server and SQL Database (I will not explain this step by step and only show the important part):
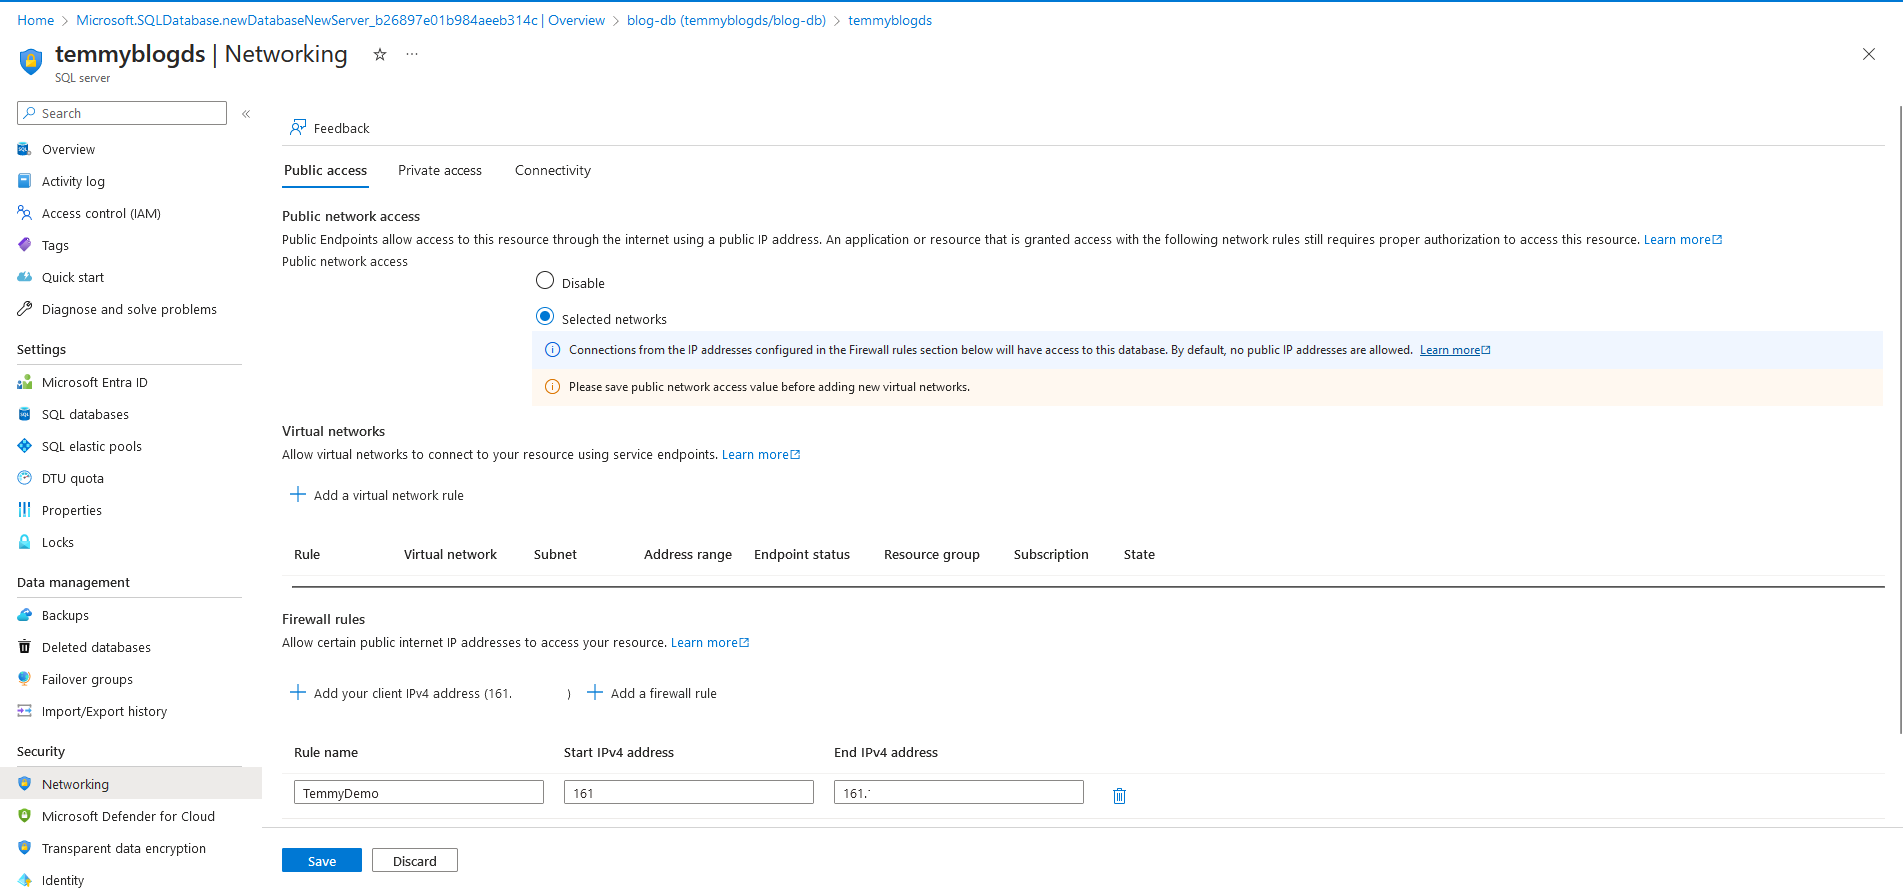
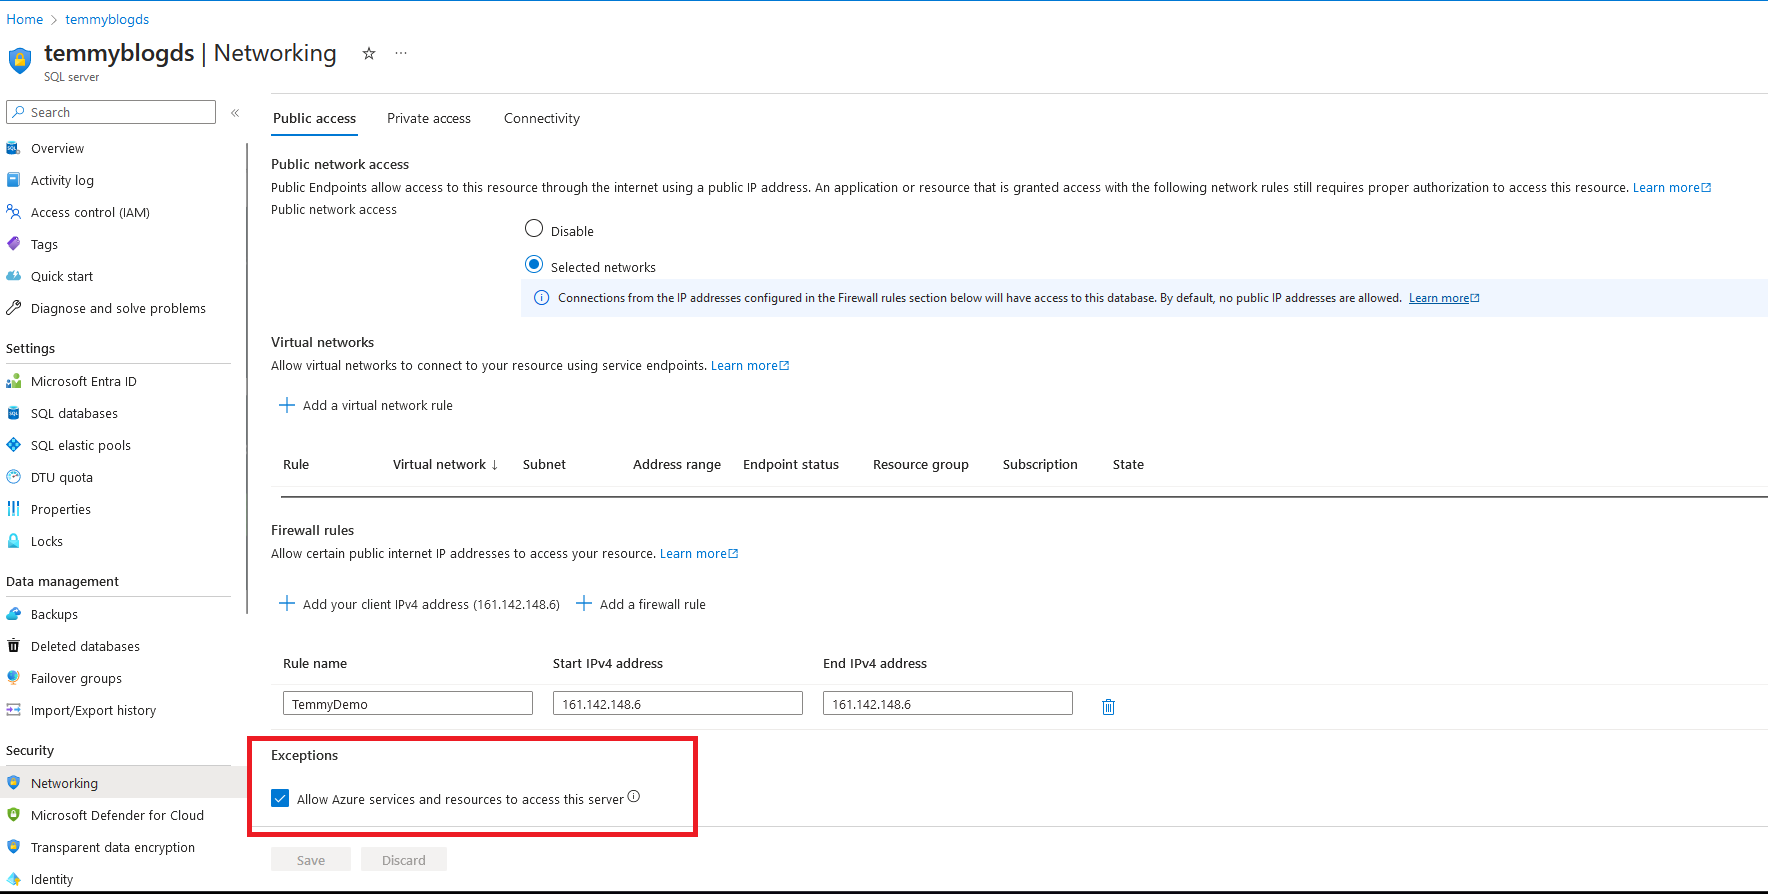
As we need to create the table via SSMS (SQL Server Management Studio), I need to whitelist my IP Address. You can click the “Add your client IPv4 address” button and hit Save:
In SSMS, you can try login and create the below table:
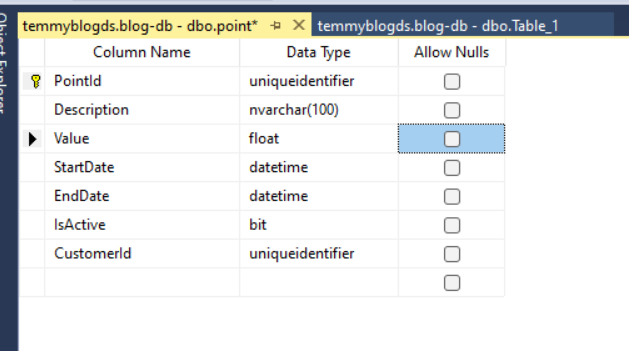
Once the table is done, we can continue to configure the Virtual Table!
Virtual Table
First, I actually tried to use step-by-step in this article. But, I can’t make it work and I’ve got an error “Server doesn’t exist”. This leads me to follow the suggestions in this forum answer (shout out to Vladi1 and rmyers64). So, basically, I need to create SQL Connection first like the below image:

If you are using SQL Server in Azure like me, you need to set the SQL Server name as “tcp:{yoursqlserver}.database.windows.net” only. This is the working solution that rmyers64 shared in the previous forum. Next, as you see in the above image, you can see that we’ve got another error regarding access permission. To fix this issue, you need to go to your SQL Server (in portal.azure.com) > Security > Networking > check the Exceptions part to “Allow Azure services and resources to access this server“:
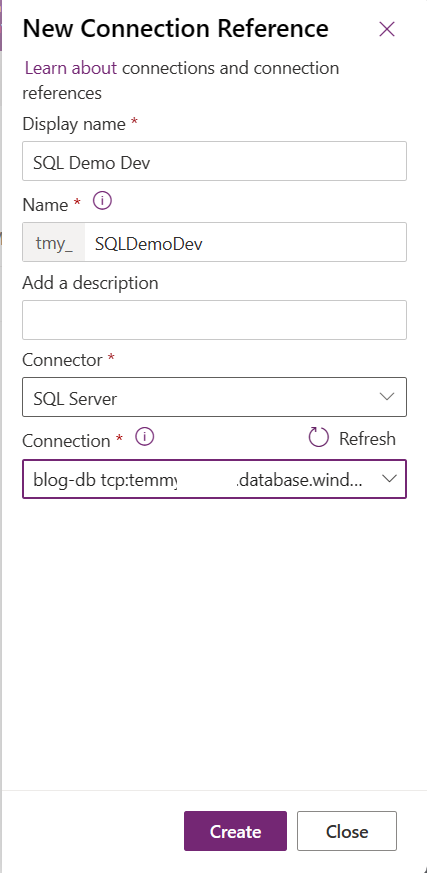
Next, we need to create a “New Connection Reference” and assign the previous “SQL Connection“. From the solution that you chose > hit “New” > “Connection Reference“ and fill in the necessary information:
If your SQL Connection is correct, then you can open the old Advance find > Entity Catalog {your connection reference Display Name}, and all your SQL tables will be listed there:

Select the table that you want to be created (Table metadata). In this step, I choose my Point table > set the “Create or Refresh Entity” to Yes > map the GUID to the UniqueIdentifier column (which is PointId) > map the Primary field of the Virtual Entity to the string column (Description):
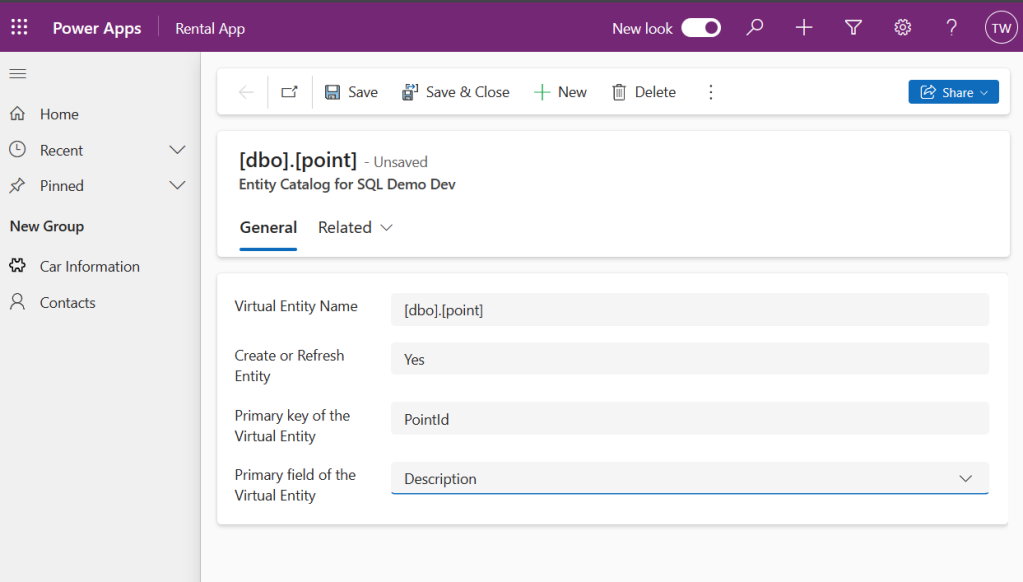
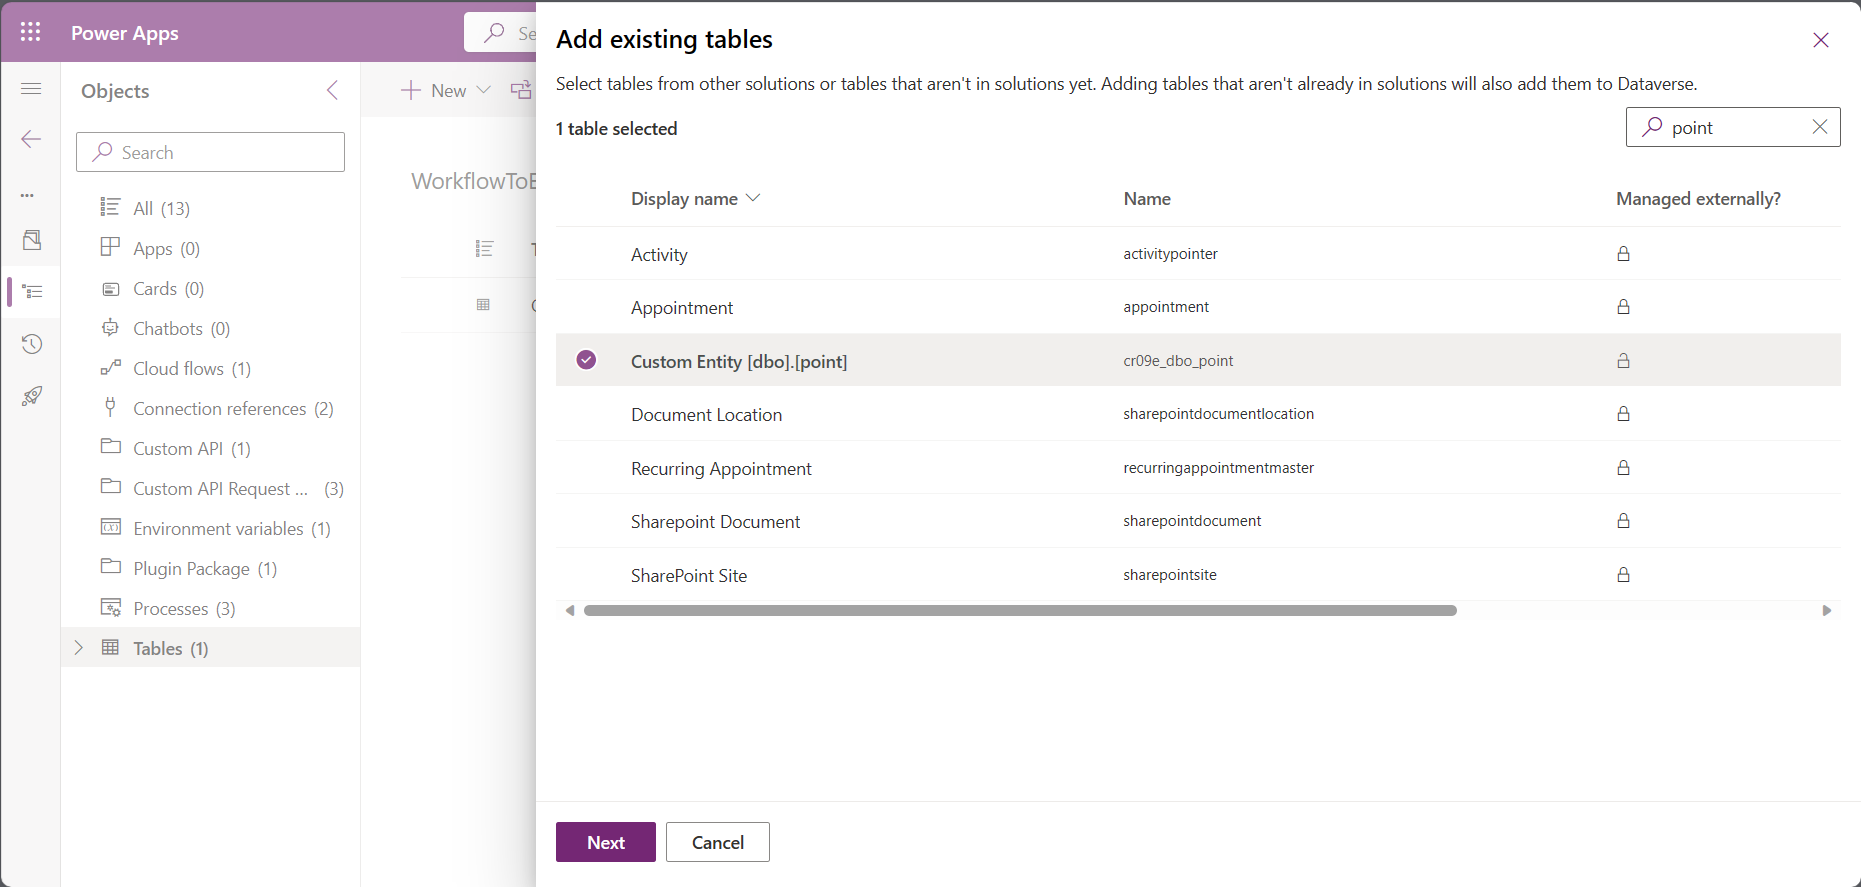
FYI, all those columns are mandatory. That is why you need to design the Table to have at least the UniqueIdentifier and also String columns (for Primary Key and Primary Field mapping). Once you are done, you can click Save and Add existing table to your solution > find the table that you created just now:
As you can see, the Display name generated is not really nice. So, you can adjust the table name, and form layout, and also rename the views (follow your preferences).
Next, we want to add a Lookup attribute in the Point table. Before you add the relationship, we need to manually delete the ContactId (UniqueIdentifier in SQL – but will be set as String somehow in Dataverse) attribute which by default will be populated in Dataverse. The reason for this is to avoid the error regarding mapping that already exists > Once you deleted the attribute, go to Contact table > Relationships > add One-to-many relationship and fill in the below information:

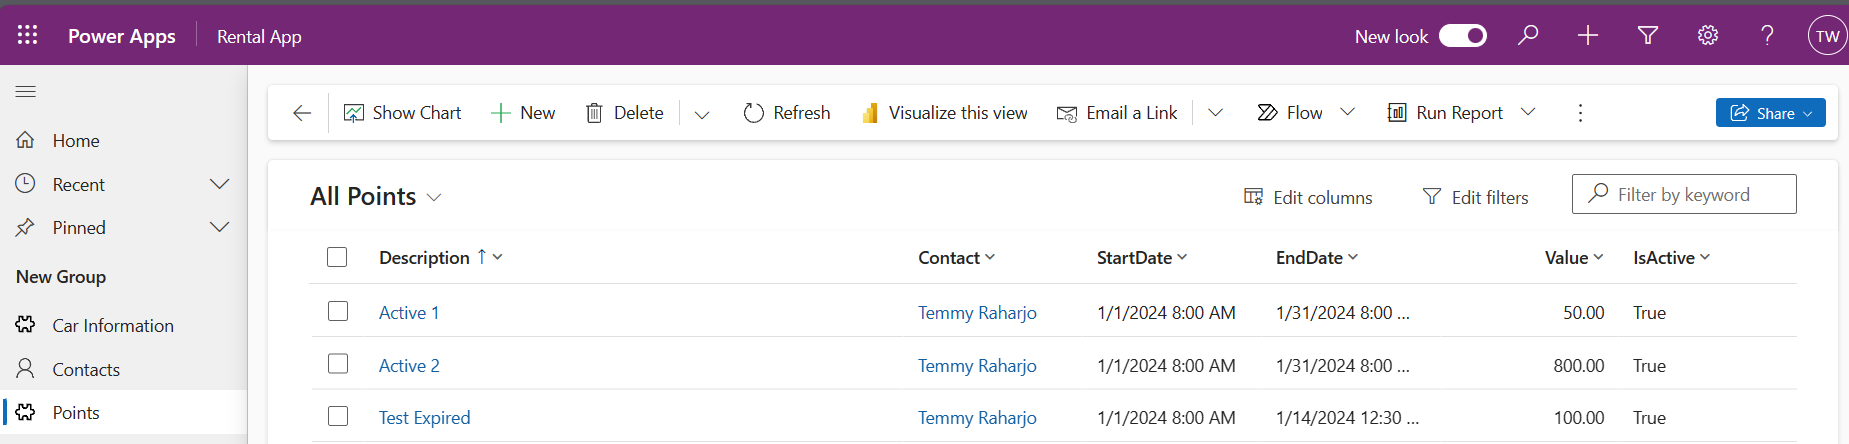
Once you click Save > I believe the table will work perfectly (CRUD operations can be tested):
Summary Table
Next, what I’m thinking is to make the easiest implementation for a summary of the points per Customer. We want to validate if the points Added/Deducted are valid (for example Customer A has 100 points and hence can’t deduct 110 points).
The initial thought is to use Dataverse Formula Columns. But, when I tried this, IntelliSense did not detect the Point table. So, we can’t use this way for now.
Next, I tried to use the Rollup column. Again, the problem here is if we want to add Filter logic like IsActive = 1 AND StartDate <= UTCNOW and EndDate >= UTCNOW, the rollup column can’t be used. Also when I just add the IsActive = 1, the UI can’t detect the Value attribute.
This leads me to this alternative version: using SQL Views! First, I created the view using the below query:
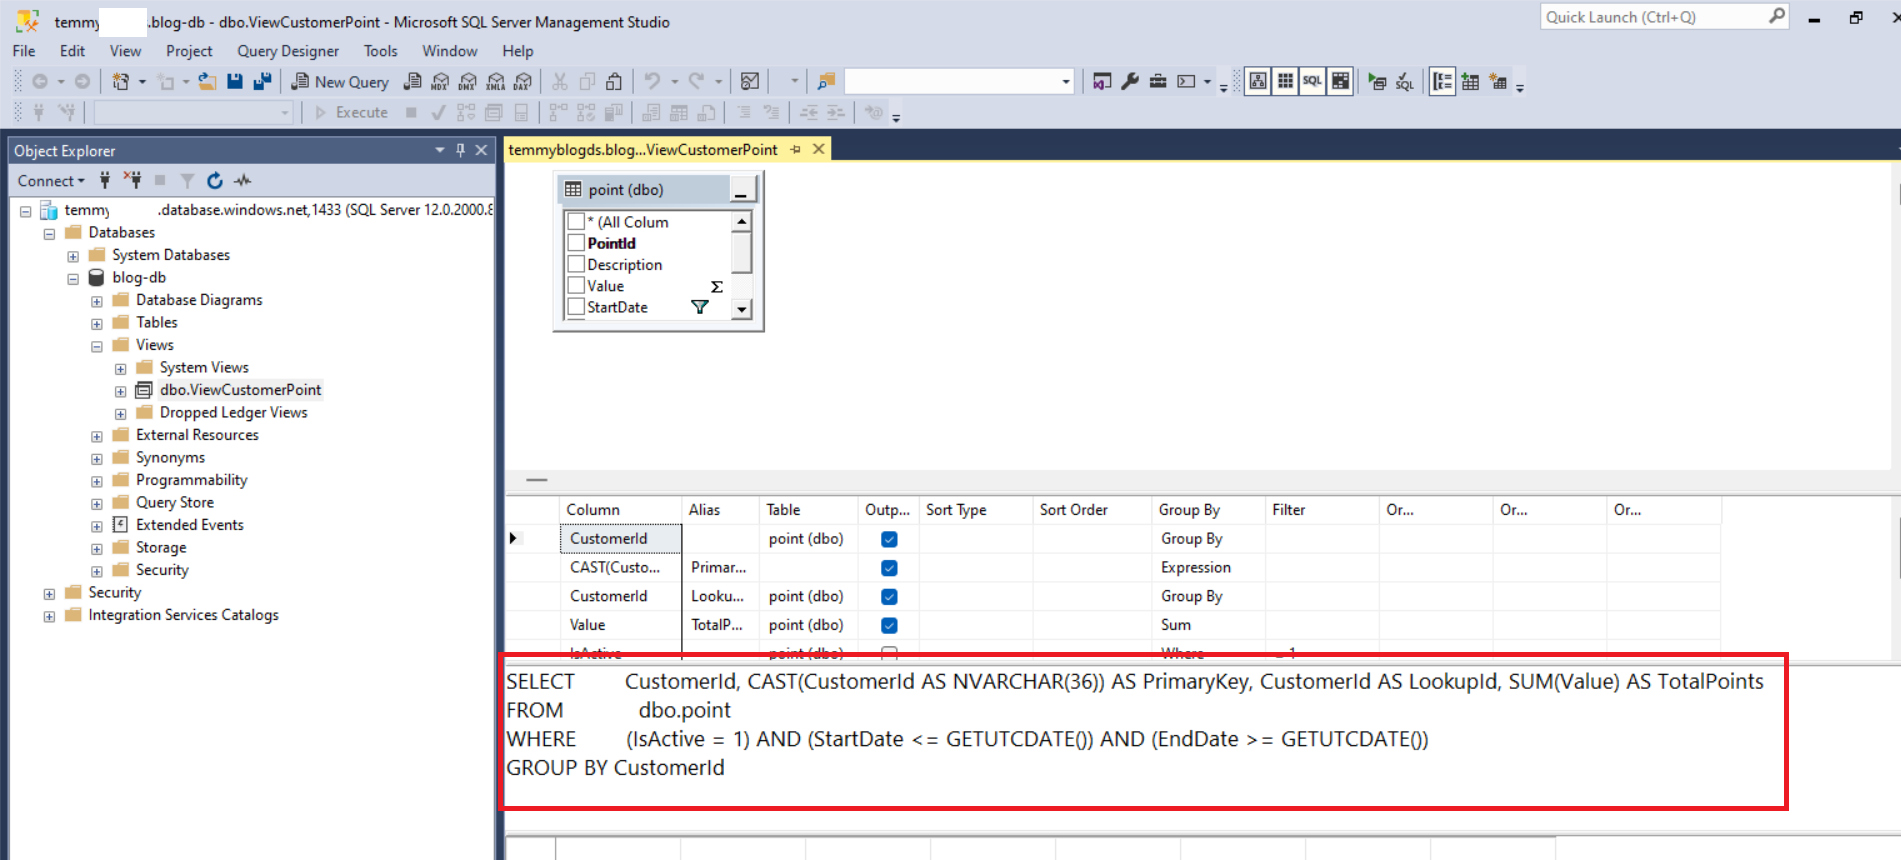
As you can see, I created a view using the SUM function. The logic that I want to apply also can be implemented via the Where clause. Again, as Virtual Table at least needs to have Guid and String attributes, that is why I’m adding the PrimaryKey attribute (Convert the GUID to string). Also, later on, I want to add a relationship from Contact to this View as well. That is why we have the “LookupId” attribute which is actually a copy value from CustomerId (we need to map a unique value).
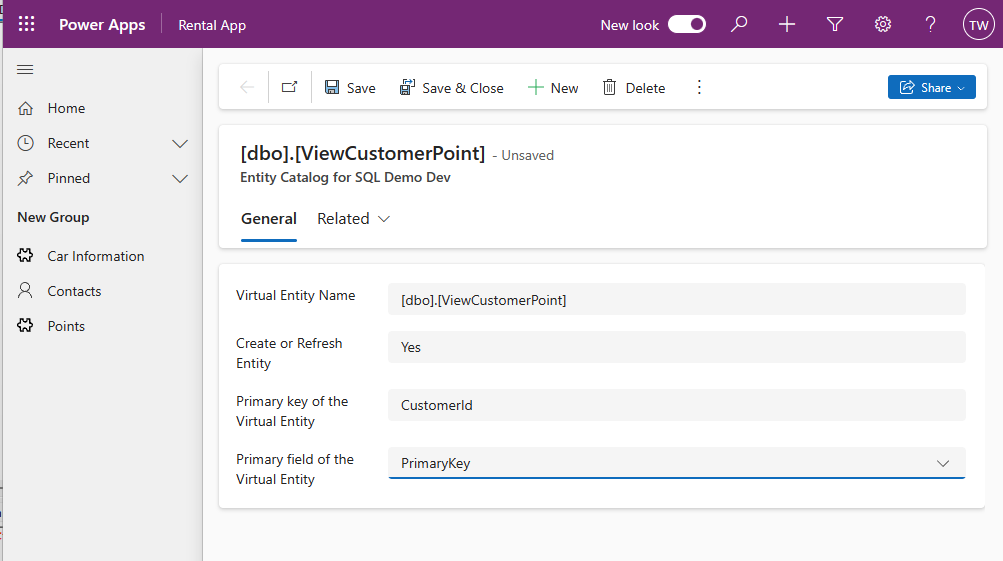
Next, we can check again the Entity Catalog views > select the View table > fill in the information > click Save so Dataverse can automatically create the table for us:
Once the Entity is created, again, you need to go to the Summary Table > Delete the “Lookup Id” attribute. Then, go to Contact > Relationship > add One-to-many relationship again:

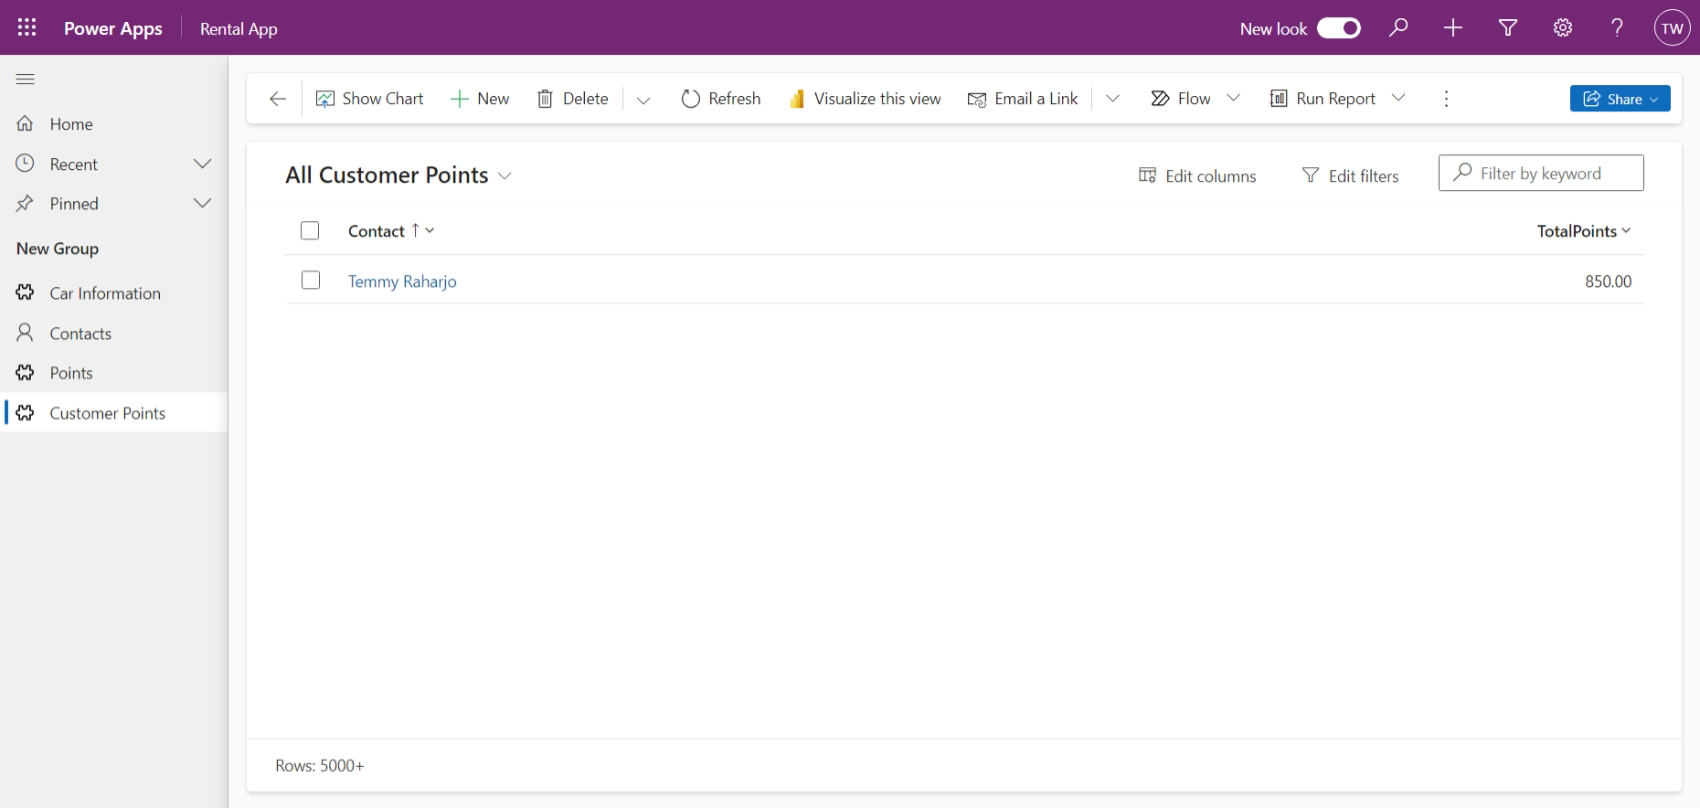
From this point, you can change the Table Display Name, and adjust the Form, Views based on your preferences. Here is the sample working Customer Points table:
Create Plugin and Others
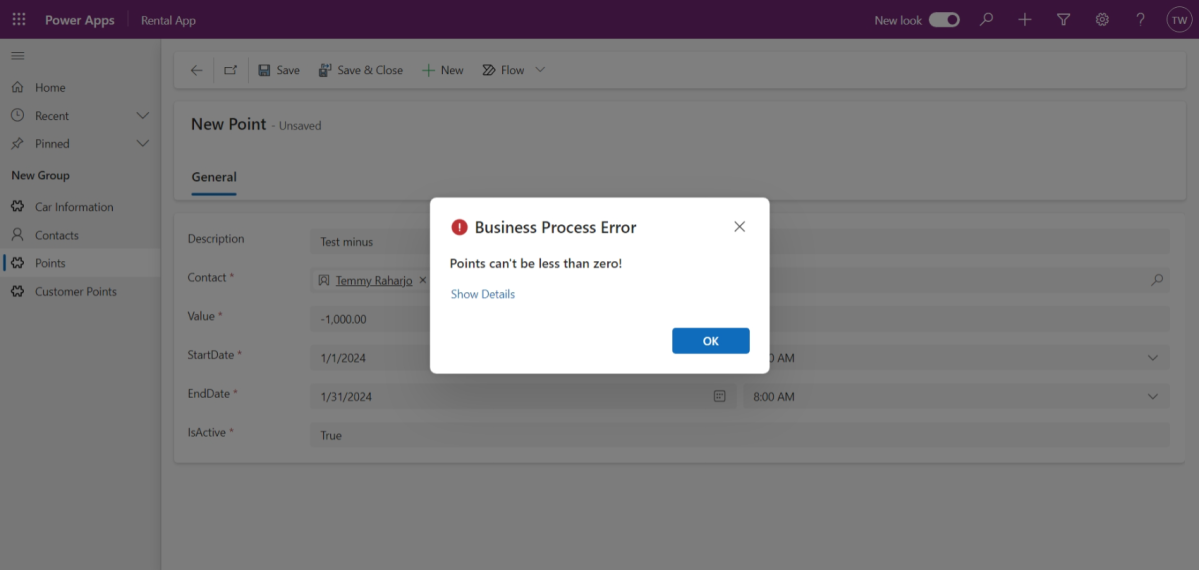
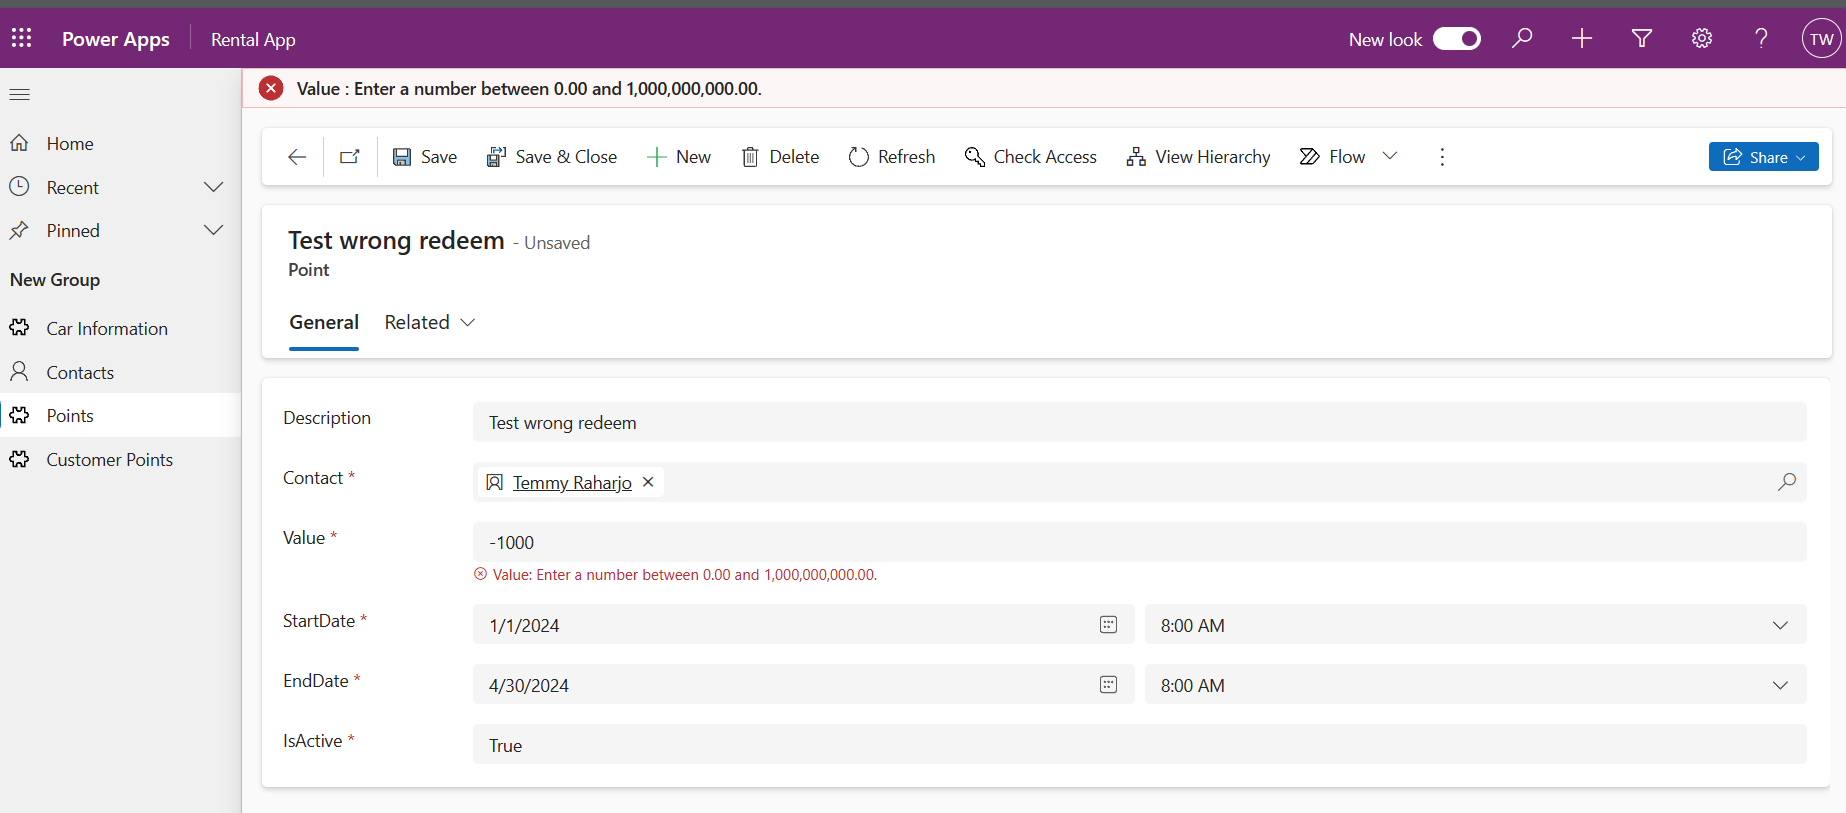
Before we created the plugin, I tried to create a minus value point and got the below error:
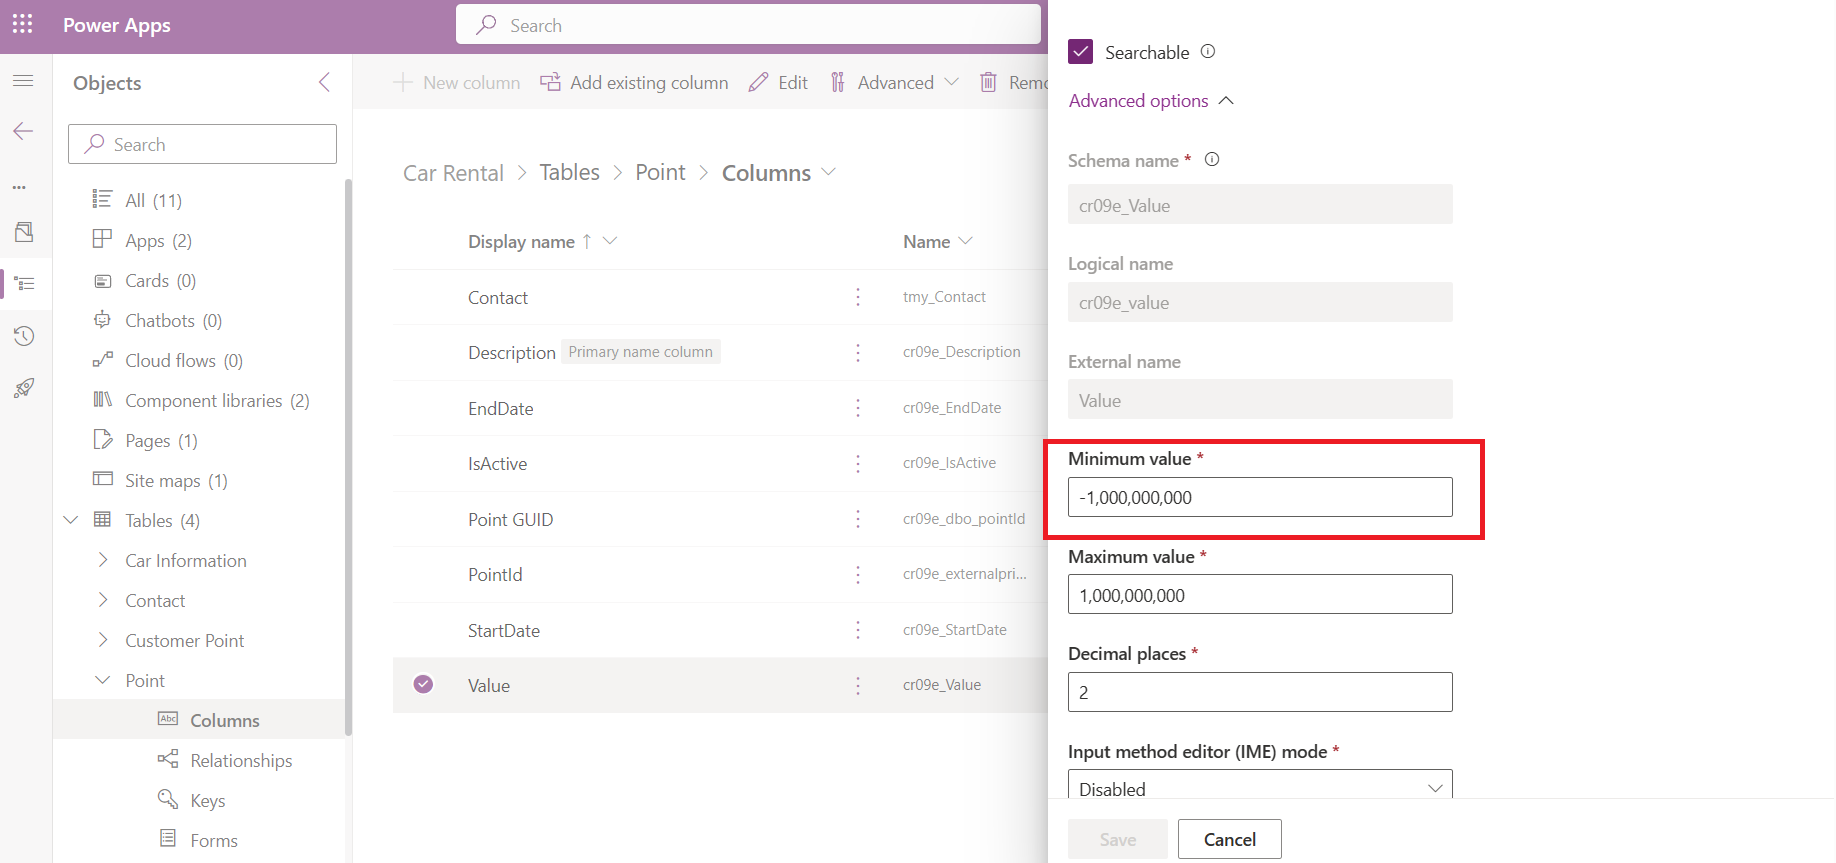
To fix this issue, you just need to go to Point Table > Value Column and update the “Minimum value” to accept minus value:
Next, I created the below Plugin for validation purposes:
using Microsoft.Xrm.Sdk;
using Microsoft.Xrm.Sdk.Extensions;
using Microsoft.Xrm.Sdk.Query;
using System;
using System.Linq;
namespace BlogPackage
{
    public class PreValidateCreatePoint : PluginBase
    {
        public PreValidateCreatePoint() : base(typeof(PreValidateCreatePoint))
        {
        }
        protected override void ExecuteDataversePlugin(ILocalPluginContext localPluginContext)
        {
            var adminService = localPluginContext.OrgSvcFactory.CreateOrganizationService(null);
            var target = localPluginContext.PluginExecutionContext.InputParameterOrDefault<Entity>("Target");
            var value = target.GetAttributeValue<double>("cr09e_value");
            if (value > 0) return;
            var customerRef = target.GetAttributeValue<EntityReference>("tmy_contact");
            if (customerRef == null) return;
            var currentCustomerPoint = GetCustomerPoints(adminService, customerRef.Id);
            if (currentCustomerPoint + value > 0) return;
            throw new InvalidPluginExecutionException("Points can't be less than zero!");
        }
        private double GetCustomerPoints(IOrganizationService adminService, Guid contactId)
        {
            var query = new FetchExpression(
                string.Format(@"<fetch xmlns:generator='MarkMpn.SQL4CDS'>
                  <entity name='cr09e_dbo_viewcustomerpoint'>
                    <attribute name='tmy_contact' />
                    <attribute name='cr09e_totalpoints' />
                    <filter>
                      <condition attribute='tmy_contact' operator='eq' value='{0}' />
                    </filter>
                  </entity>
                </fetch>", contactId));
            var result = adminService.RetrieveMultiple(query);
            var value = result.Entities?.Sum(ent => ent.GetAttributeValue<double>("cr09e_totalpoints")) ?? 0d;
            return value;
        }
    }
}
The logic in the above is pretty simple. We just need to retrieve the cr09e_dbo_viewcustomerpoint where the tmy_contact is equal to the tmy_contact that we want to add. If SUM of cr09e_dbo_viewcustomerpoint.cr09e_totalpoints + Target.cr09e_value less than 0, meaning the points are not enough. That’s why we need to throw an error.
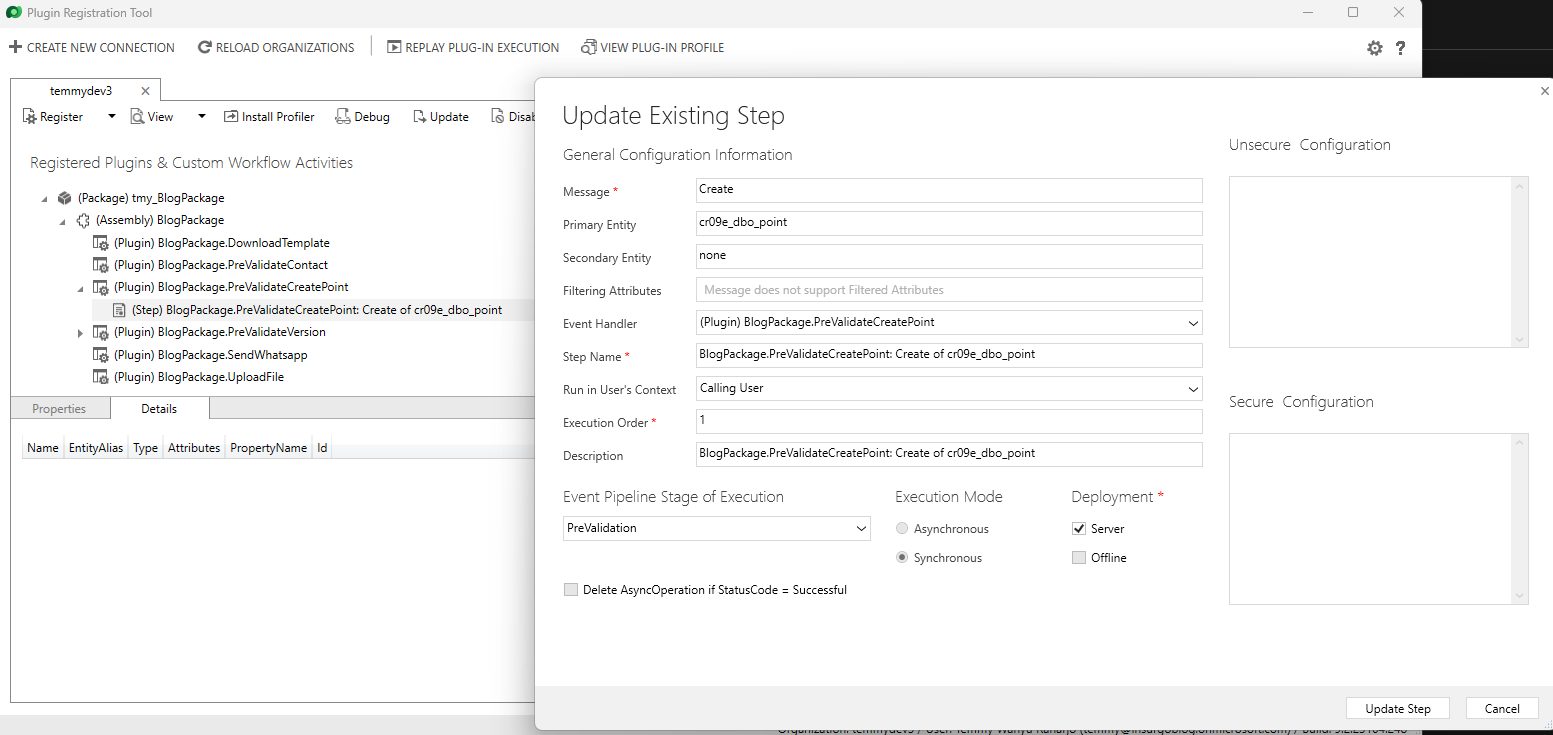
Next, we just need to deploy the Plugin and create the necessary steps:
Once you are done with this, you can verify the plugin:

With this method, if you create CRUD via Canvas Apps/Power Automate using Dataverse Connector, the business logic has already been applied. What do you think about this approach?
Happy CRM-ing!

One thought on “Consume Virtual Table (SQL Table) Data in Dataverse and apply business logic”